Initial integration of Capitain with Pohoda
To enable the integration between your company in Capitain and your Pohoda installation, you first need to install Agent Nisa on the server or computer where your Pohoda instance is running. Agent Nisa runs as a Windows service. We recommend entrusting the installation to your IT department or system administrators who manage your servers and computers.
Before you begin, make sure that…
- Agent Nisa (the file nisa-agent.exe) is not already installed on the server or computer in question (duplicate installations would cause integration issues). If it is already installed and you simply need to connect an additional accounting entity in Capitain to the same Pohoda instance, continue with the next chapter.
- You are using the "Pohoda SQL" or "Pohoda E1" edition of Pohoda (see Pohoda documentation). The Basic edition "Pohoda" does not support this integration with Capitain — you can only import XML files with invoice data into it manually.
- The server or computer running your Pohoda instance uses the Windows operating system.
- The user account you use to access the server or computer running your Pohoda instance has administrator privileges on that server or computer.
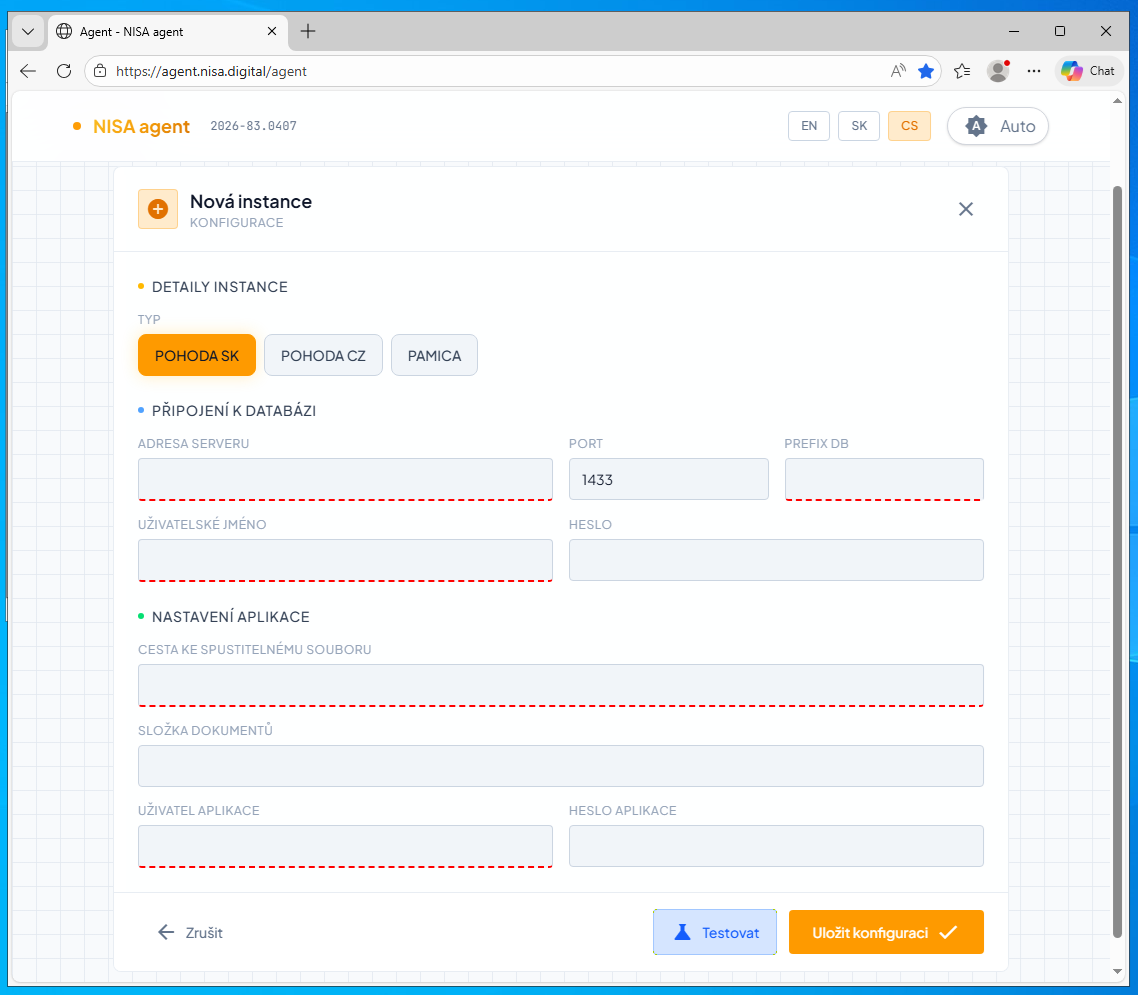
- You know the administrator login credentials for your Pohoda installation, you know the location of the Pohoda documents folder in the directory structure, you have the MSSQL login credentials, and you know the server address, port, and database prefix.
Steps
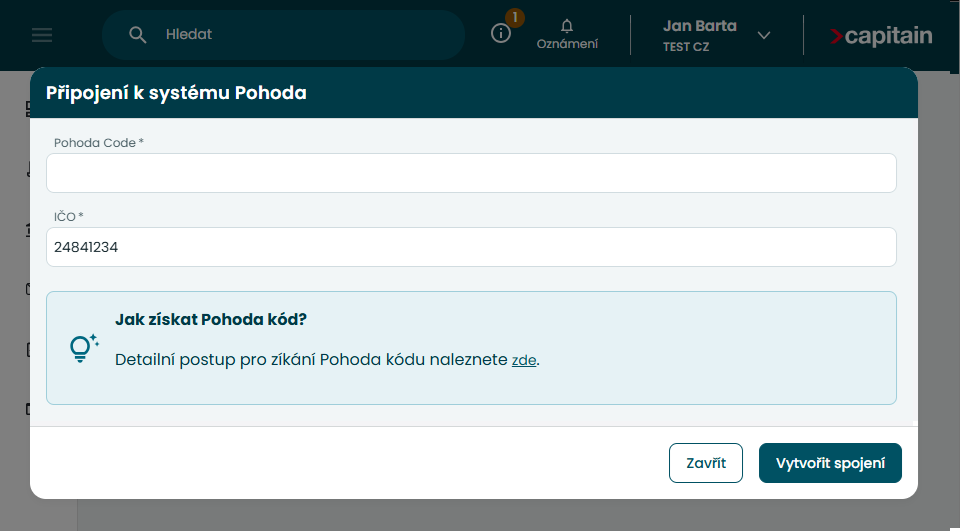
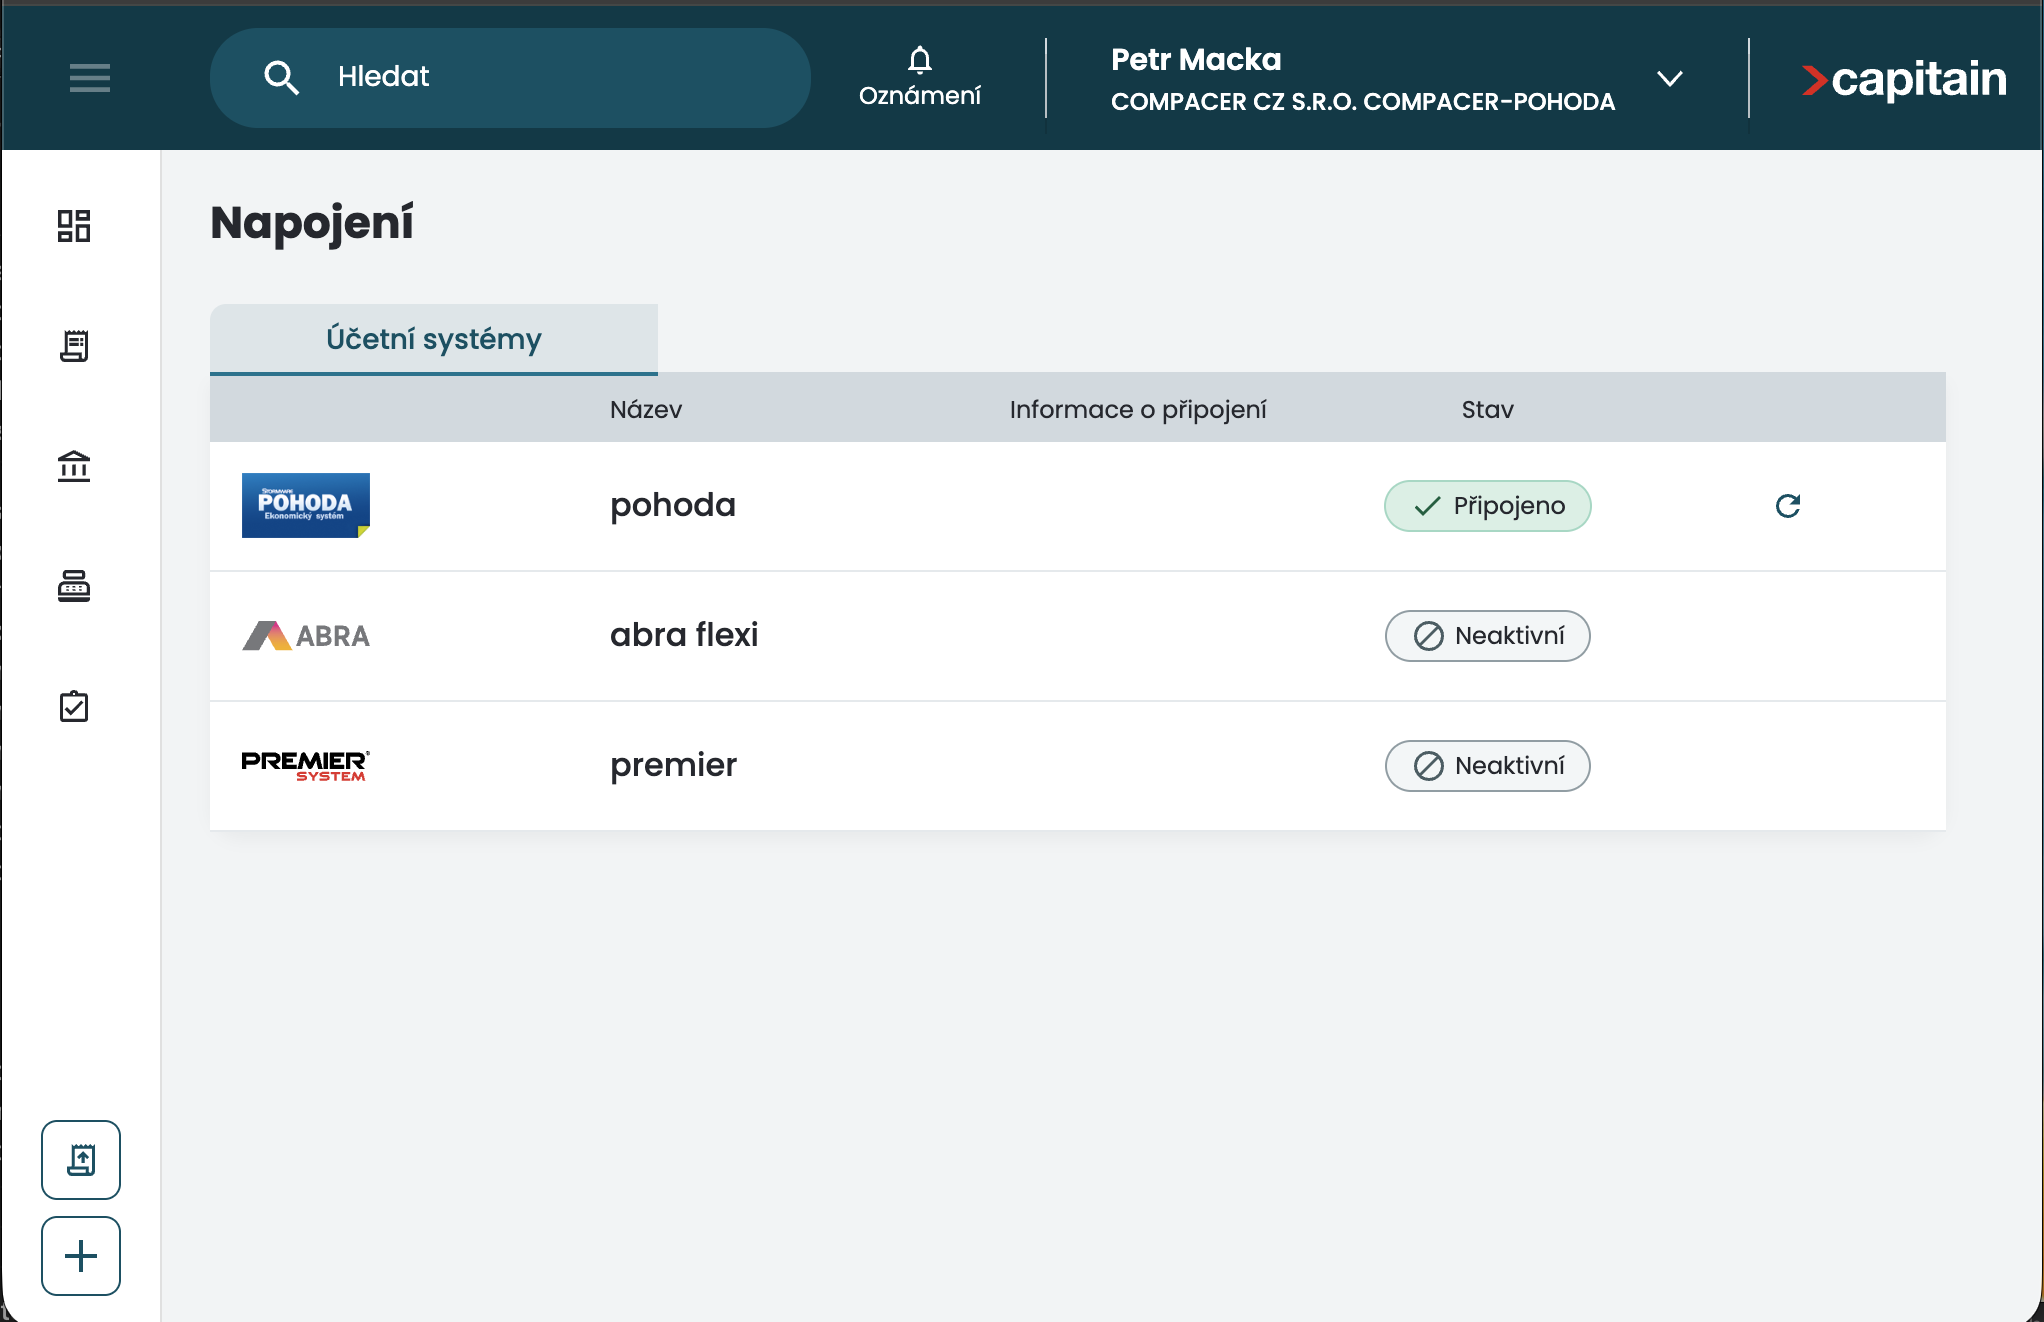
- In Capitain, open the menu in the top-right corner next to your name and company name, and select "Connections" – "Accounting systems" – "Start connection".


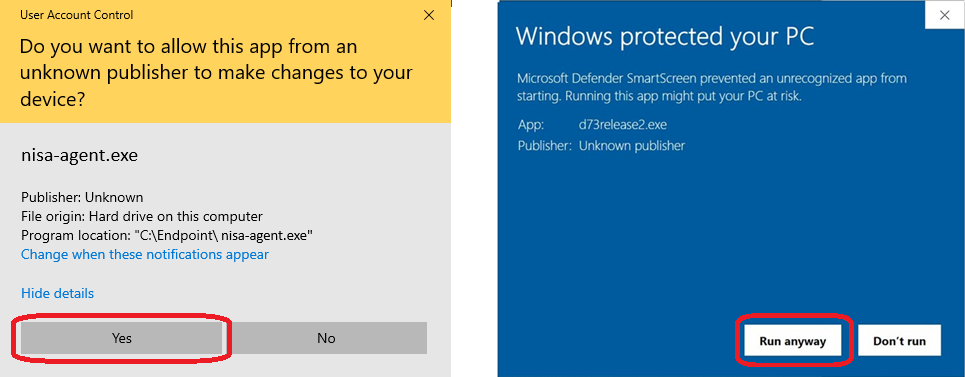
- Log in to the server or computer where your Pohoda instance is running using an account with administrator privileges, and download the installer file from https://agent.nisa.digital/nisa-agent.exe
- Run "nisa-agent.exe" as administrator and confirm any security warnings.

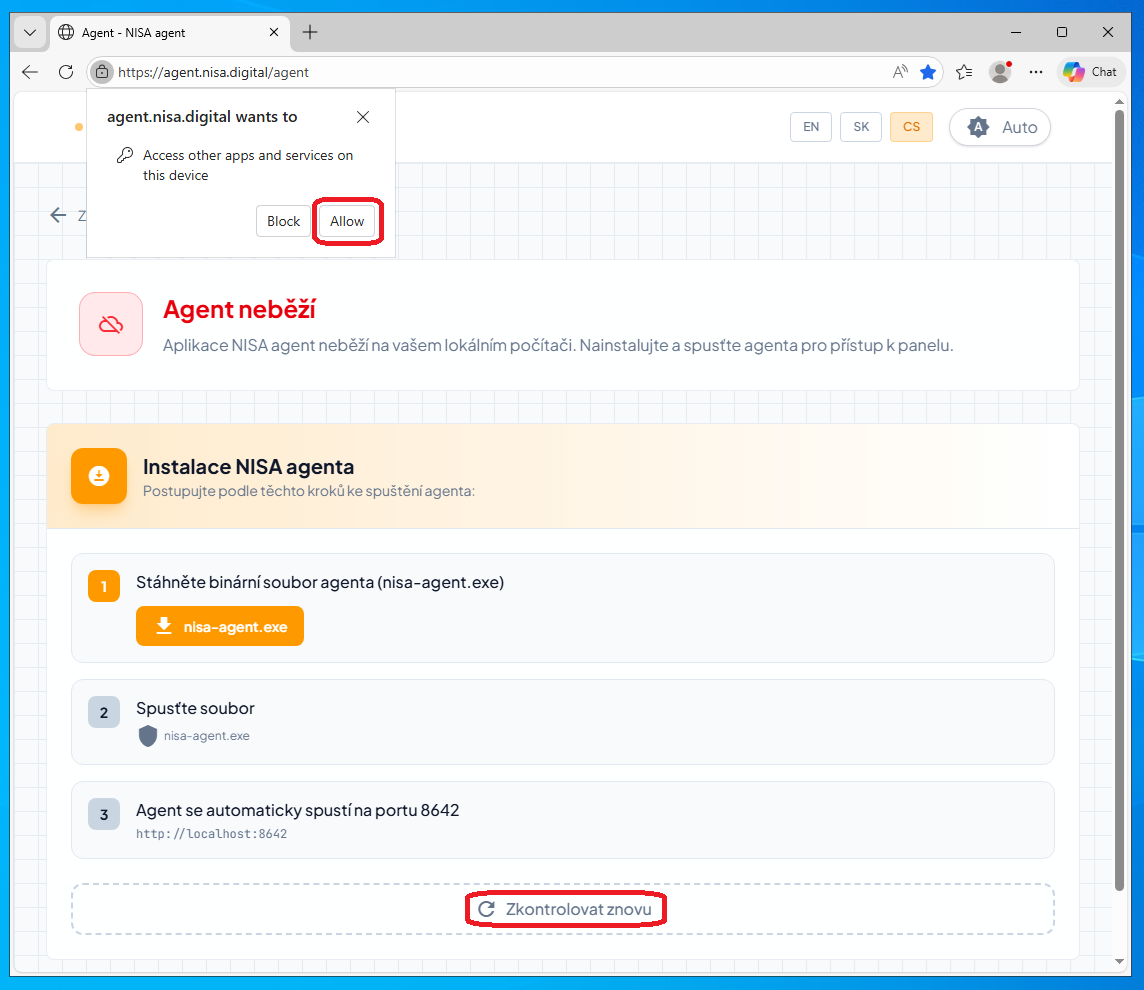
- Open the address https://agent.nisa.digital/agent in a web browser to display the Agent Nisa user interface. Allow any warning about Agent Nisa accessing applications and services on this device, then refresh the interface using the "Check again" button.
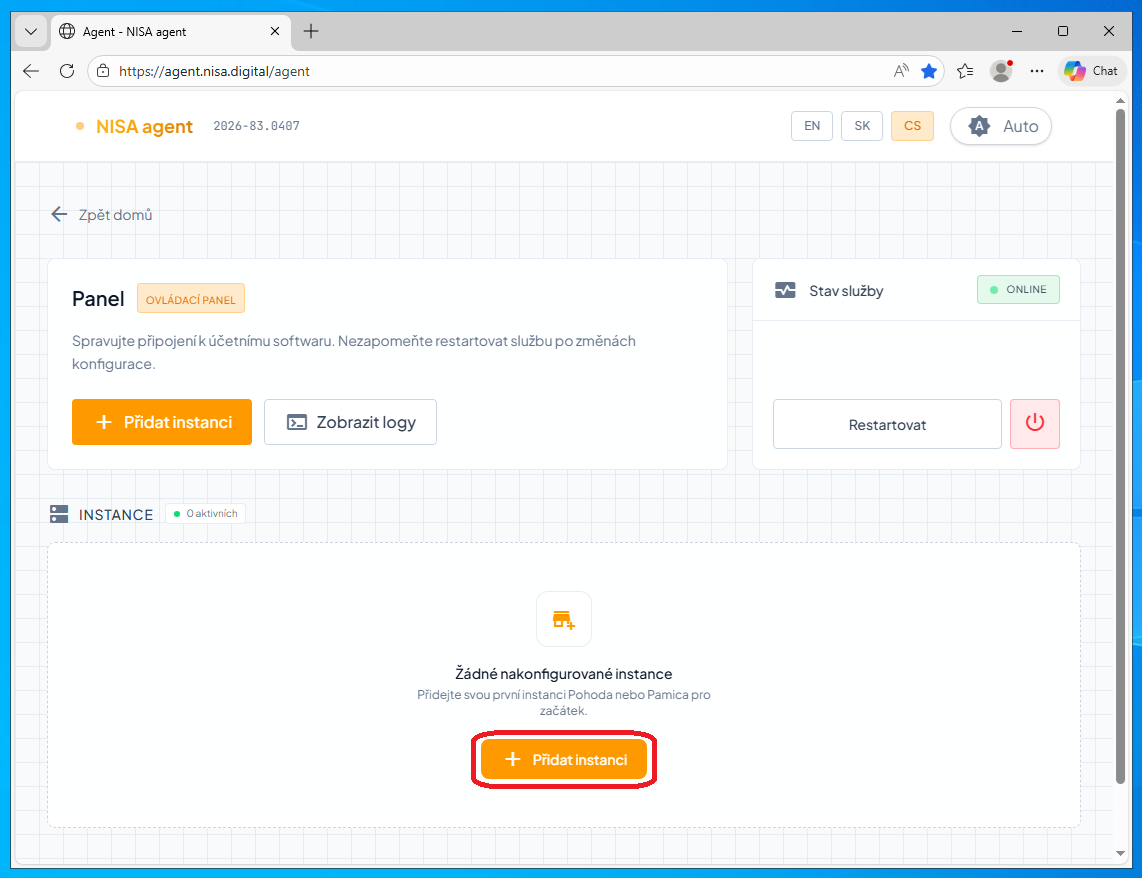
- In the user interface, use the "Add instance" button to create a service instance (just once) and enter the Pohoda and MSSQL parameters.
 Note: you can update these parameters in the future using the pencil icon next to an existing instance.

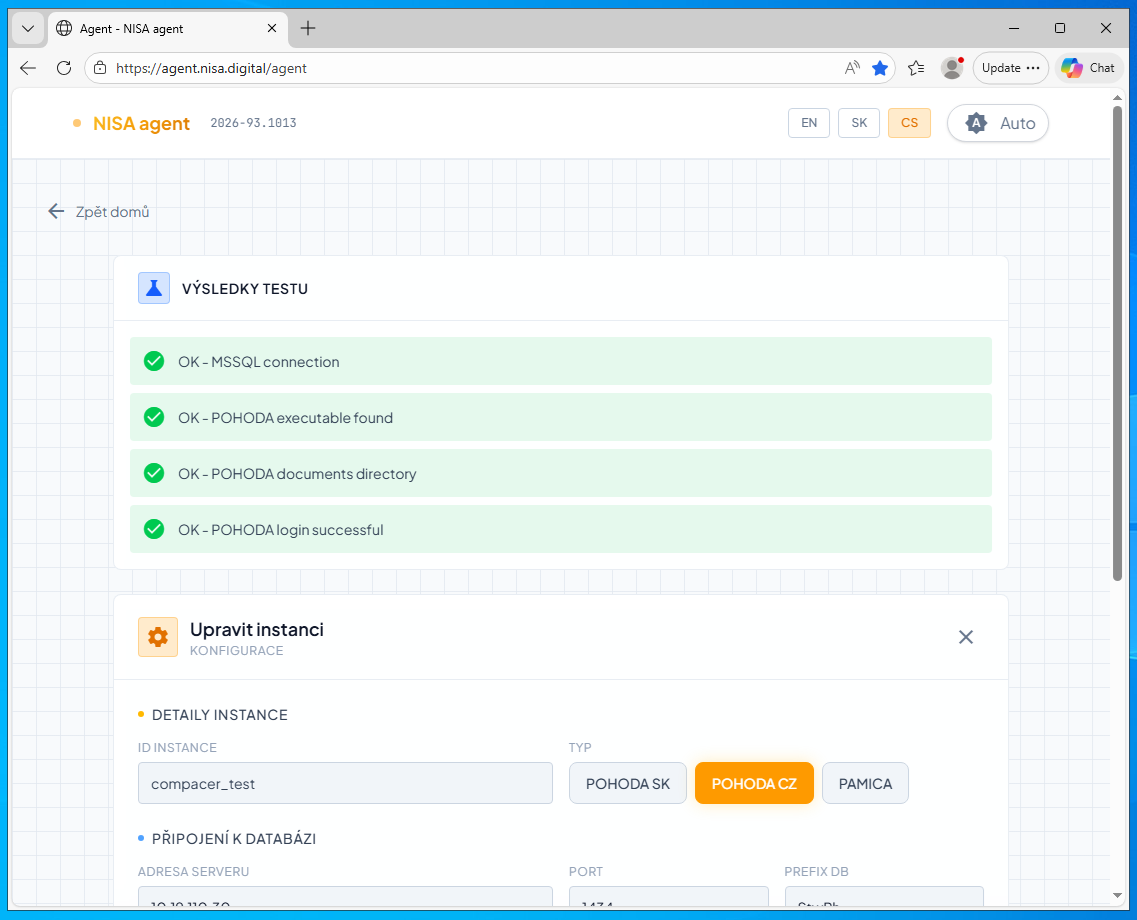
- Once all parameters have been entered, use the "Test" button to verify the connection. If everything is configured correctly, the "Test results" section will confirm this and will show no errors.
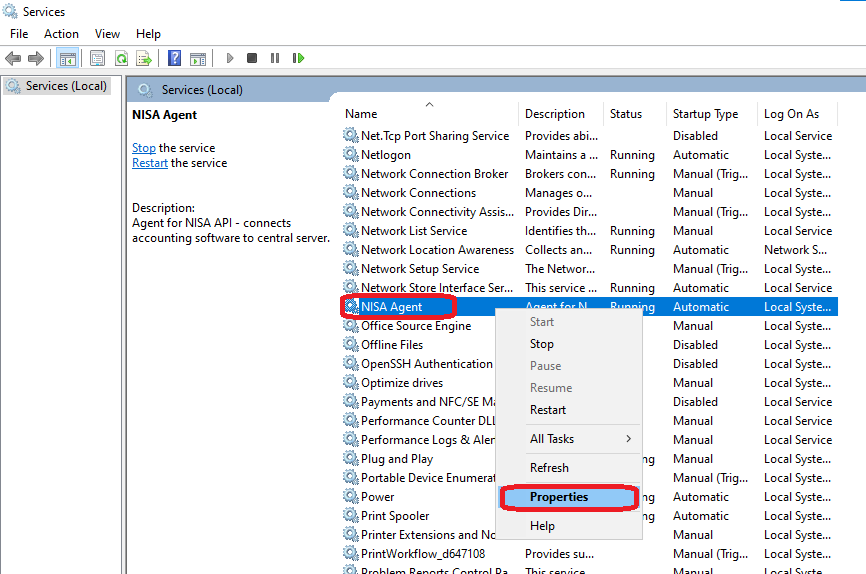
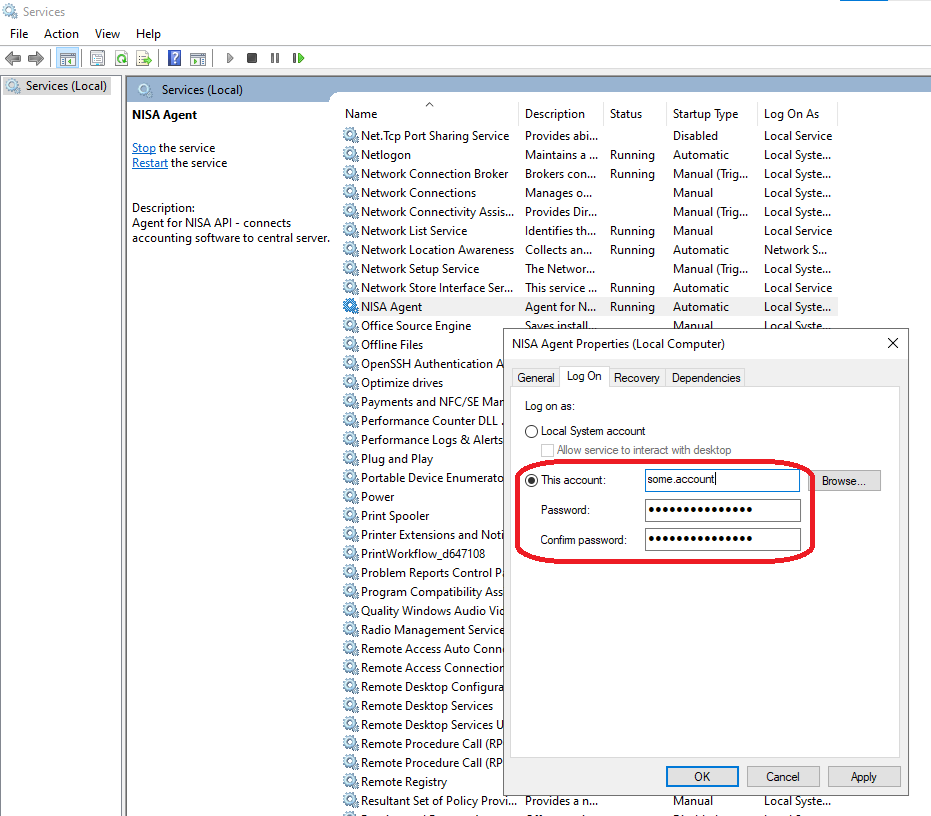
 Depending on permission settings, the service may not have access to nisa-agent.exe or may be unable to start it. To resolve this, open the service properties in Windows Services management for that service and enter the credentials of a specific administrator account that has permission to run services (menu "Properties" – "Log On").
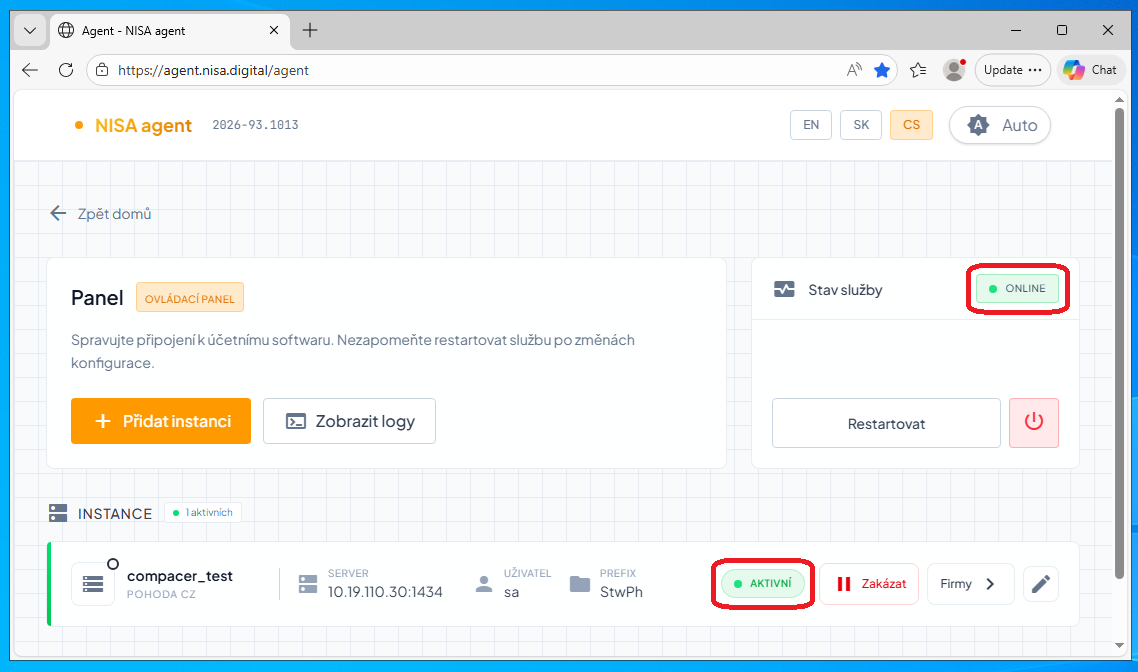
- After a successful test, save the new instance configuration using the "Save configuration" button, which will return you to the instance overview (the home screen of the user interface). Your instance should now display a green "Active" status, and the service status (top right) should show as "ONLINE".

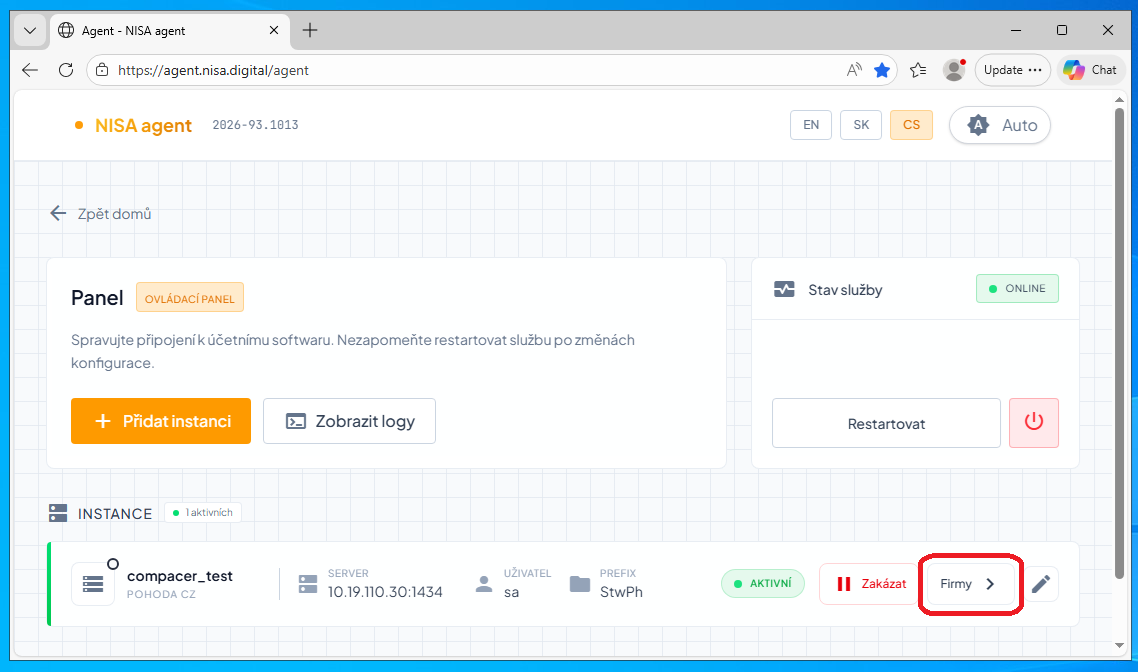
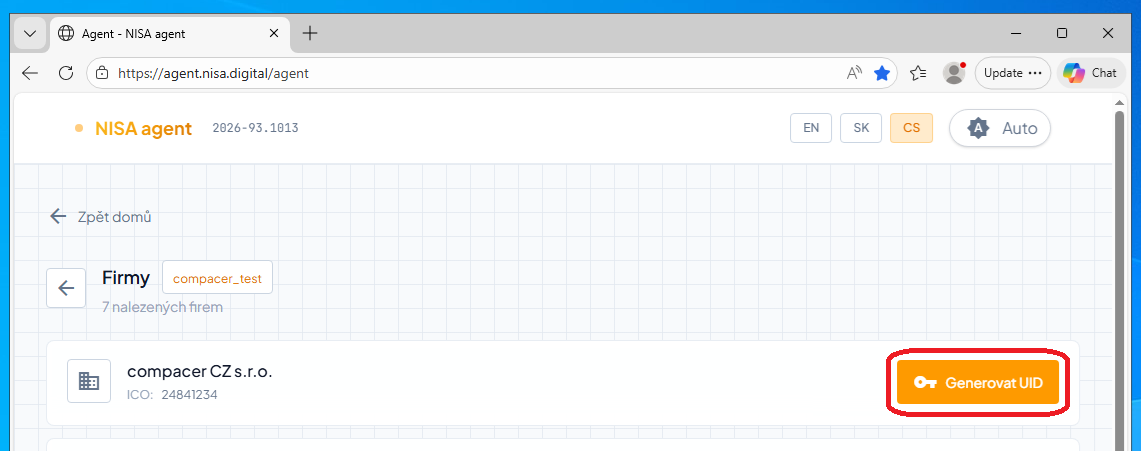
- Use the "Companies" button next to your service instance to display the list of accounting entities from Pohoda, then click the "UID" button next to the entity you want to connect to Capitain to generate its API key.

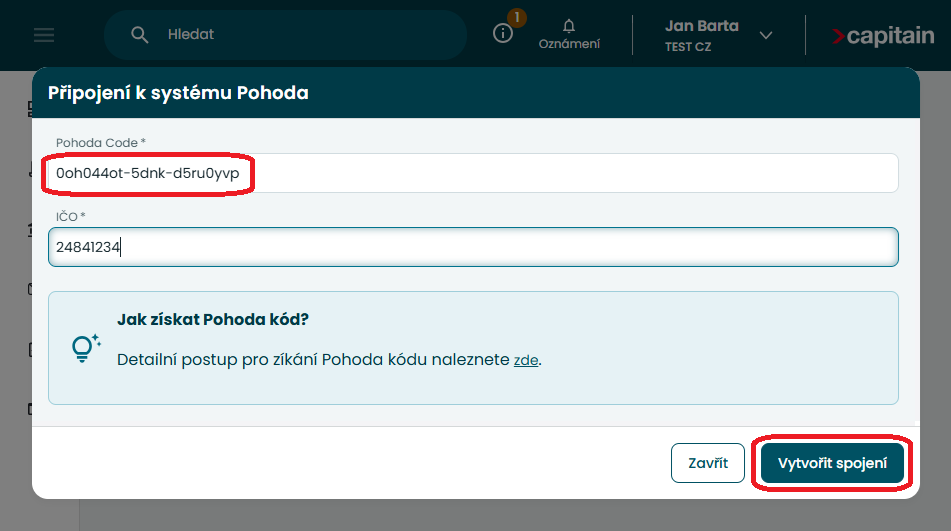
- Copy the generated API key and paste it into the "Pohoda Code" field in the integration form in Capitain. Complete the process by clicking "Create connection".
- Remember that for the integration to work, the server or computer on which Agent Nisa is installed must remain switched on.